I Art What I Do- A Bookish DIY Project For Your Bookshelves!
“You can’t use up creativity. The more you use, the more you have”- Maya Angelou
In my free time, I often try to look up new projects to decorate my bookshelves. Here, I like to express myself and reflect on who I am as a reader, as I believe that a bookshelf can say a lot about a person. Today, I would like to introduce you to my favourite bookish DIY project, which I try to do at least once a year. I first encountered this DIY in 2021 when I stumbled upon its BookTok trend and immediately fell in love with this cute decoration idea. Today I want to talk about mini books and how you can easily craft your own.
Mini Books are exactly what the title promises, they are DIY books made of paper and glue. Here, you can create mini versions of your favourite books in only 5 steps. This project, in the form I am presenting it, requires a computer, the Internet and a printer. However, I have also heard of people who did not need these extra materials and did all of the steps by hand, it just takes a bit longer and is slightly more work.
Step 1: Think about what books you want to create and make a list. You will need a picture of the cover of every book which you can either take yourself if you own the book or have access to it, or you can look it up on Google. Now that you have decided on your books you have to create a template. I usually work with Canva where I create many 5×3.1 cm rectangles.
Step 2: Now that we have a base you can insert one cover into one box- make sure that it is on the left-hand side and sits right at the edges of the base rectangle. After this, you simply duplicate the cover and rotate it 180° and insert it on the right-hand side of the base. If you have done this the hardest and sometimes also the most nerve-wracking part is over! After that, you can decide on a spine colour and simply click on your base and change its colour to match the book’s cover or the actual book’s spine.
Step 3: In this step, you simply print the template you’ve just created and cut out every rectangle.
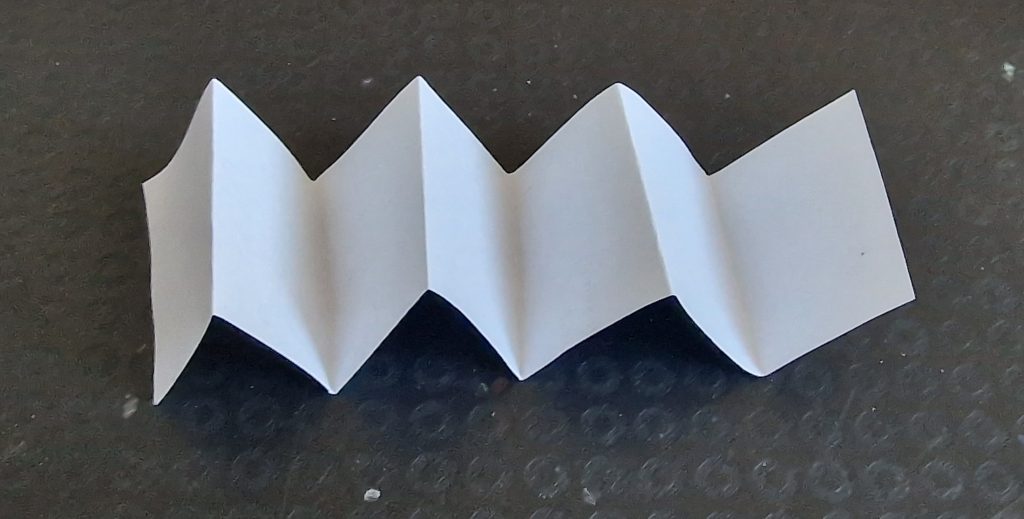
Step 4: Now that your book covers are ready you need a book to put it on. For this, you have to cut out paper stripes that are the same width as your templates, in this case, 3.1cm. After you cut them you have to fold them, alternating between front and back creases. Ensure they are the same size as your book covers so they do not stick out later.
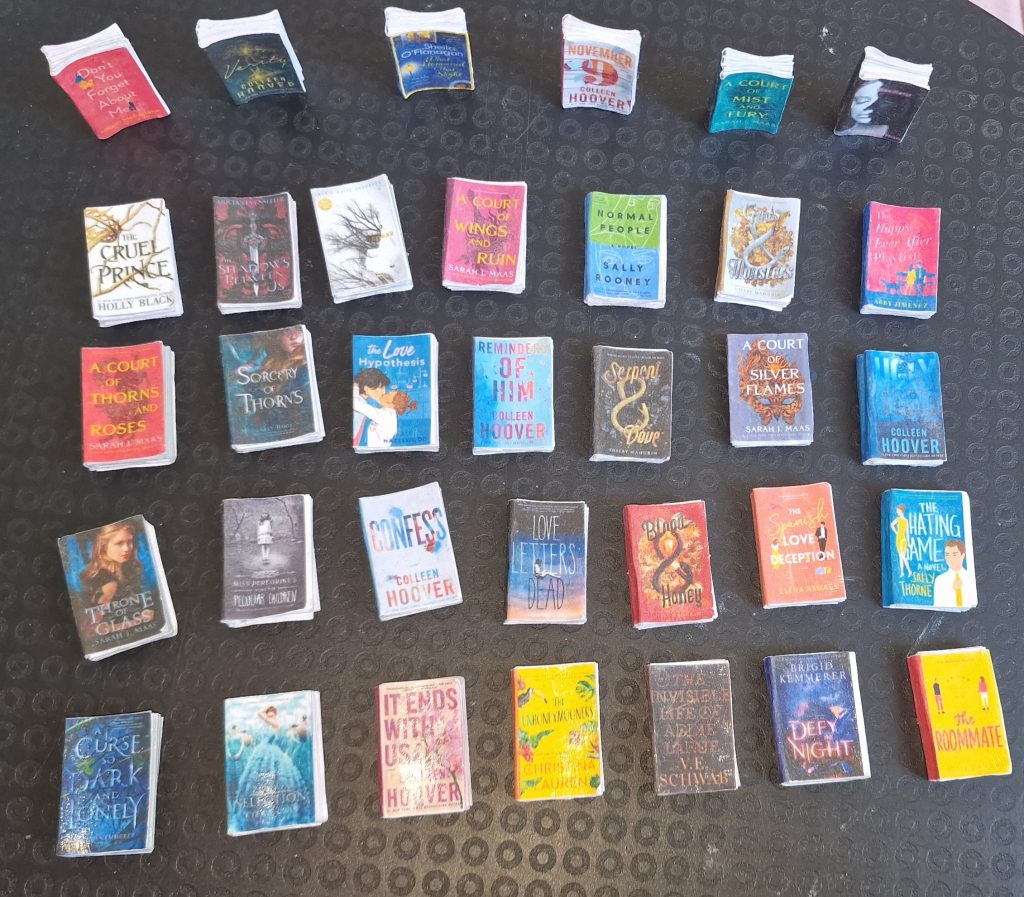
Step 5: Get out your glue because it is time to put your own little book together. For this last step, you glue your folded paper strip on the unprinted inside of the book and fold it until it is in shape. If you want you can also put glue on the cover for a shiny finish or put it in between the folds so that the book eventually is more solid and looks a little bit thinner. These, however, are only suggestions for something I prefer and in no way necessary steps for it to work properly. And now you are done-it is simple as that!
I created my Canva template in 2021 when I was not yet enrolled in university and had a little more time. I am aware that not everyone who might be interested in this project has the needed time to create such a template therefore the link below will guide you to my own template which you can use if you’d like! It contains empty and coloured bases, a page full of exemplary book covers to show you what the finished template has to look like and a sheet of right-sized strips, ready to print.
Have you crafted your own mini-books before? Have you heard of this trend before this blog entry? What is the first book which you would want to create?
Have fun crafting your books and decorating your shelves!
Lisa A.